This is maybe not per any instructions they have, but it’s based on a new codeplug I’m generating due to a move in the future (And some business travel in the interim). There’s a lot to consider, and maybe your operating model will be different than mine, so you may have a different concept of how your codeplug should be laid out. My basic assumption is that I want all of my physical repeaters to have dedicated zone(s) (consider it a geographical zone) with the same talkgroup lineup. Some repeaters may have multiple zones, such as one for TAC talkgroups and one for a specific set of talkgroups, such as the recommended iowa zone of ARES districts, NWS offices and interoperability talkgroups. Some will only have a set of my “friendly” talkgroups (DMR Campfire, P25 Bridge, etc. Things I am likely to chat on during a commute.
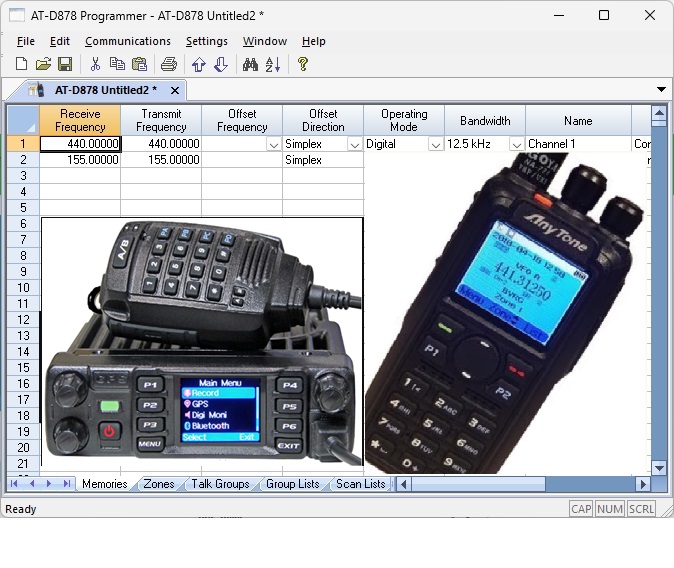
Note that this is a pretty basic analog / DMR codeplug. I’m not using 2-tone/5-tone, I’m not using receive groups, I’m not using scan lists or roaming at the moment. The roaming may be a future post if i use it more…. I don’t use scanning much, as I generally hang out on one or two repeaters that I know.
To the extent I see reasonable and useful, I’m trying to use the features built into the software here, such as repeater lookups, etc.
I’m listing out the steps in the logical manner for my operation – your mileage might vary.
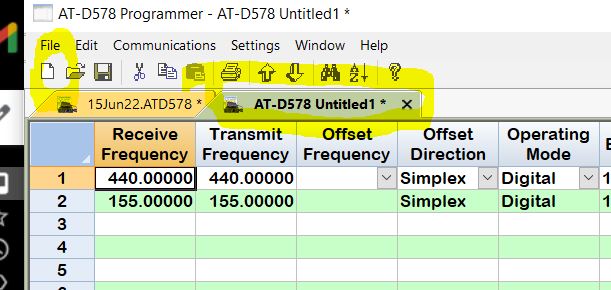
Step 0: New Codeplug file
Pretty straightforward – click the “new file” button, and a new codeplug tab is added.
Step 1: Radio settings and user info
Before entering any other data, it’s probably best to go through and get the radio settings menu set up, and especially get the radio IDs in.
Radio IDs are set on the Radio IDs tab:
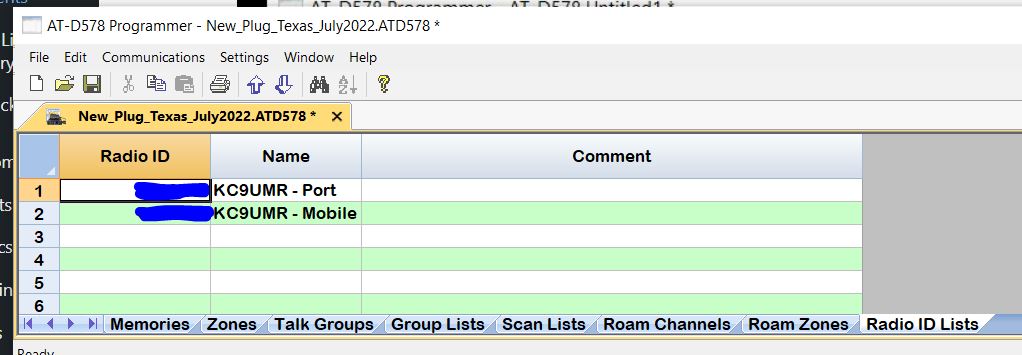
At this point, I’m assuming you know where to get your DMR ID. Most codeplugs need only a single radio ID. I have 2, as I have one for my portable and one for my mobile. I have them both in the codeplug, as I try to use the same codeplug for both radios.
Most of the setting menu options can be set up at any time, so there’s nothing (except startup zone and any channel references, like for APRS) that’s sequence specific here.
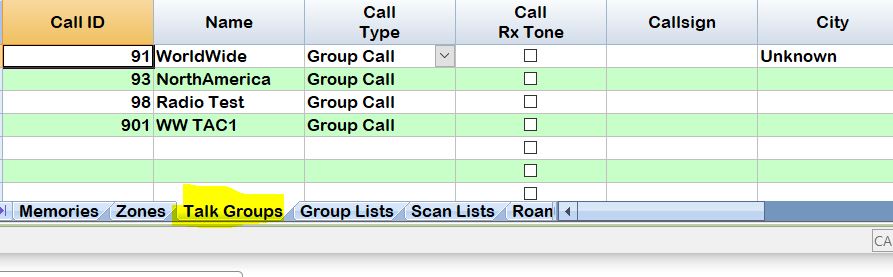
Step 2: Populate the talkgroup list
At the bottom of the program window, select the “Talkgroups” tab. Enter all of the talkgroups you plan to have in the radio here, and set them as group calls. This is probably the most painstaking step, as the software does not currently have a way to import these from excel, and they cannot be copied and pasted from another file. One recommendation may be to create a blank codeplug file and ONLY populate all of the Brandmeister (and/or DMR-MARC and/or TGIF) talkgroups. This file could then be used as a basis for whatever codeplug the user may want to create.
I emailed RT Systems asking about a better way to add talkgroups to the software. It’s already on their list, and they’re working on a wizard to aid in this.
Update: As of Version 5.00.16, import will now import from a CSV, however, the import process requires tying each column in the file to one of the data columns in the program. A “standard” import process would be nice…
Step 3: Add DMR repeaters
Here’s the first automated part, and I kindof like this. I mentioned this in a previous post.
Click File-> External Data -> Repeater list. On the resulting window, enter your appropriate search criteria, and hit “Search”. In this case, I’m using the entire state of Texas, with no cities included, as I’m not sure exactly where repeaters are located. This software is not advanced enough to search within a radius, but I don’t think that’s a huge drawback.
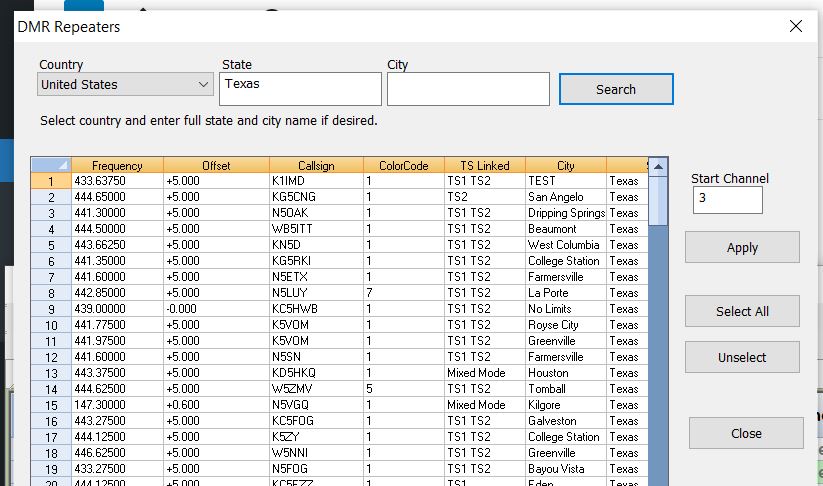
I would suggest clicking on the “City” column heading to sort alphabetically based on the city. If you have a small enough data set, like, the state of Iowa, it’s not as much of an issue. Then select the repeaters you want using the CTRL key to select multiples, or shift and down arrow after selecting one – the same as selecting multiple rows of data in excel. Once you have the ones you want, click “apply”, and the software will insert those into the memories tab. Keep doing this until you’ve added all the repeaters you want for this go-around.
At this point, you’ll likely want to change the names of the memories so you know at a glance where your zone is based, unless you’re just that good with callsigns. I’m not – especially when moving. It might be helpful if the comments field automatically included the city name, although adding different cities in batches, and then updating info would be a wiser option.
Step 4: Make Lots of copies
OK – as i’ve said before, I like to have my zones be about 16 channels, just based on some historical radio things. This is the tedious part, sortof. Select you channels – in my case, I have 17 physical channels. Copy them, and then paste them below the selection. Then do this 14 more times, so you have a total of 16 of each physical channel. This will use a lot of channels (17 * 16 = 272 channels!)
Step 5: Select your talkgroup lineup
Once you have all your channels, select them all and sort by the name column (assuming each repeater has a unique name). Now it’s time to populate your talkgroups. For each of your 16 channels on the first grouping, select the appropriate talkgroups.
Step 6: Duplicating Talkgroup Lineup for each of the repeaters
Once the first zone is set correctly, copy the cells for those talkgroups, ctrl+c to copy them, and then paste them over the (default) talkgroups for each of the other repeaters you’ve created channel batches for.
Step 7: Naming for Convenience
That was the easy part. Now the difficult (well, most time consuming) part – assigning a name to each channel that makes sense. There’s a lot of ways to handle this. You could come up with very unique names for each one, using locations or other information, such as callsigns. As outlined here, my preference is to tag the zone with the pertinent location / callsign info along with a hex representation of the repeater’s DMR ID, and then name the channels with the talkgroup ID and the hex representation used above. This helps me to group things together. Renaming the individual channels to reflect the appropriate hex ID is the most time consuming part of all this.
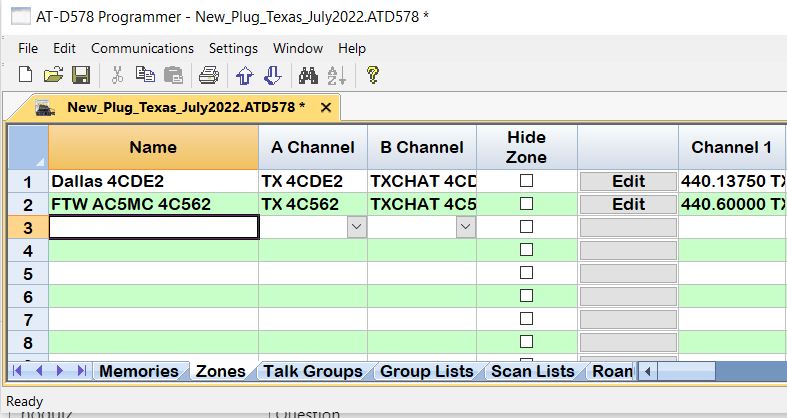
Step 8: Create Zone Lists
For now, the user needs to have zones planned ahead of time. I emailed RT Systems and asked about either a “Add to New Zone” option to the context menu that comes up when right clicking after selecting channels, or adding “New Zone” to the existing “Add to Zone” button. They let me know it’s on their list. As I outlined before, I prefer to give my zones a name corresponding to their location, some identifier, and then a hex string corresponding to their DMR ID. But there IS one hitch – you can’t create an empty zone – so every zone needs at least one channel in it once you create it.
Step 9: Apply Channels to Zones
If you have all of the channels created and named ahead of time, then this is easy, and can be accomplished one of two ways. First, you can, in the zone tab, enter a new zone name, select your “A” and “B” channels, and then hit the “Edit” button for that row. The button is only available once you have a name for the zone.
This will bring up a zone channel selection window which works much like the other software packages, allowing you to add or remove channels from the zone.

As you can see, i still have a lot of channel renaming to do…. but my channel names and zone name both reflect the same hex ID.
If you have zones pre-created with at least a single channel, then there is another way.
In the channel tab, select the channels you want in a new (existing!) zone. Right click on the selection, and in the resulting context menu select “Add to Zone”
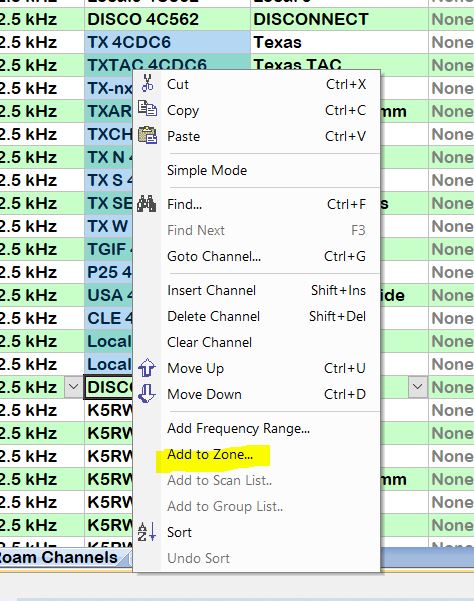
Unfortunately, this results in a blank zone channel selection window – so it’s a work in progress.
Step 10: Connect to the Radio
Now it’s time to load the memories into the radio… and the DMR ID database (at your discretion). I’ll break this into 2 more steps…
Step 10a: Loading memories into the radio
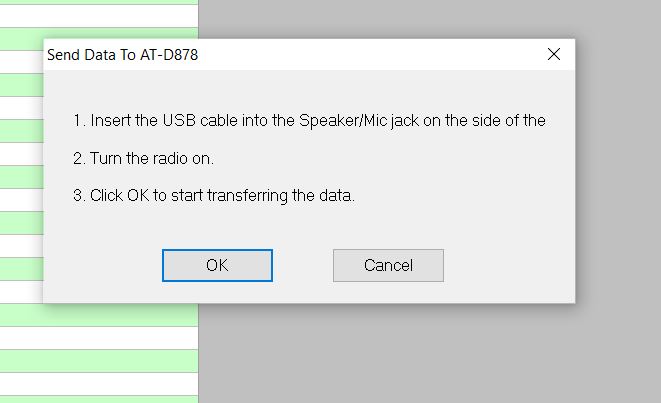
Pretty straightforward…. on the top menu, click “Communications” then “Send Data to Radio”.

then follow the onscreen prompts.
Step 10b: Loading DMR ID Database info into the radio
This one is a bit more hidden…. First off, connect the radio to the USB port and ensure communications works.
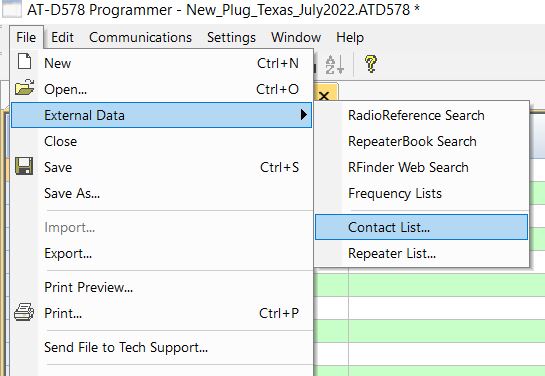
In the software, click File-> External Data -> Contact List as shown below.
Then in the resulting window, you can drill down to your country, etc. I limit the contact list to US amateurs, personally. After entering the appropriate Country, State, and City, hit the “Search” button. When the table is populated, use the appropriate mouse + keyboard operations to select your desired data (ctrl+a for all, click then shift + arrow down to select a nearby group of contacts, or ctrl + click to select a specific group of individuals).
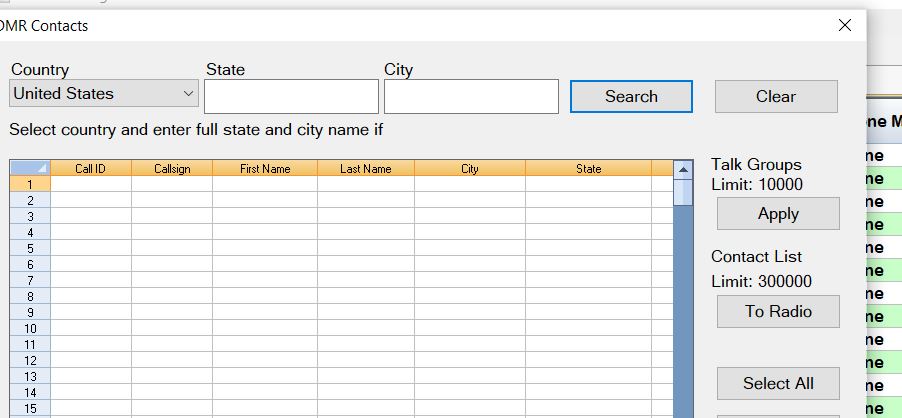
Once you have the people of interest selected (drill down to US, then select all in the table), click “To Radio.” This should directly load the contact list to the radio. This is separate from the codeplug, which should help control the file size of the actual codeplugs.
Note: I BELIEVE clicking the “Apply” button under “Talkgroups” will create a private call talkgroup with the selected individuals, so you can direct dial someone, though I have not tried it. If this is the case, use this sparingly, as this will cut down on the number of normal talkgroups you can have…. and while there’s a limit of 10,000 talkgroups (which is way more than brandmeister and TGIF have combined), it is possible to inadvertently hit the TalkGroups button by accident if you select, for example, the entire US amateur listing.