This would have been up months ago, maybe, had it not been for the accident. I decided to change up my install a bit because of new accessories. The accident made a drastic change, though.
When I got rear ended, it made the radio on the Gamber Johnson Ram top-of-dash mount bounce out of the slide mount it was on – not slide out, but ripped out of the mount. Now, this could have been a massive issue, but I got lucky. And I said that was the end of that installation- you can’t marinade a radio enough to make it taste good.

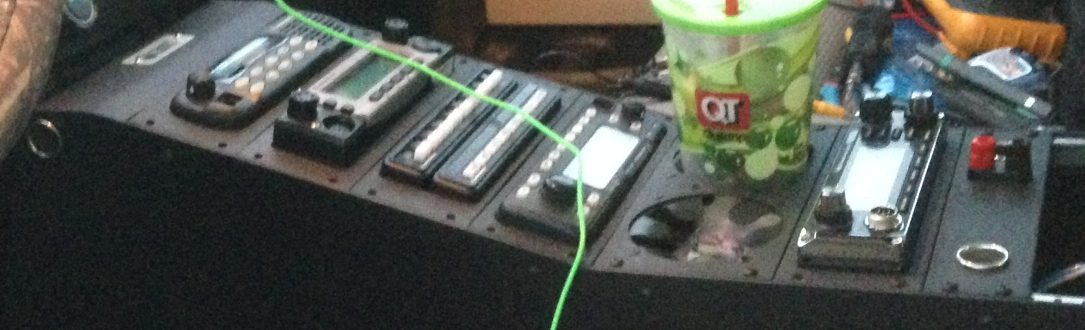
The former dash-mounted radio got moved to the sunglass compartment. Well… it got REPLACED with a much smaller 2 way radio – a DIN sized transceiver with a very shallow depth.
The uhf/vhf radio got moved from the center console location (where dodge would have had the cd player), to the panel behind the seat. Because I already had switched power back there, and antenna runs are simple, it was a very easy install. The only item I had to add was the microphone extension cable for the handheld control head. While it IS Bluetooth capable, I tend to like it wired, so I don’t have to worry about charging. This also gives me options for installation of other equipment in the future.


I got a “Mictuning” 12 gang switch panel (I only can figure about 8 needs, but spares are always a good thing). This will be installed over where the uhf vhf radio used to be, so I’ll have a little “bracket magic” to do. I have a basic idea, we’ll see if I can make it happen.
I planned some additional lighting… and this is all in addition to the body work and tailgate upgrade. At the moment, I have planned the following lighting additions:
- Bed lights under the bed rail
- Rear bumper mounted backup lighting (for trailer work, etc.)
- Front light bar
- Jumper cable outlet
- MAYBE some front driving lights
- power on/off for some additional equipment both inside and outside…
- Honestly, 12 switches might be way more than I need. I had considered a winch at some point, so that might need some power… but I won’t run out!
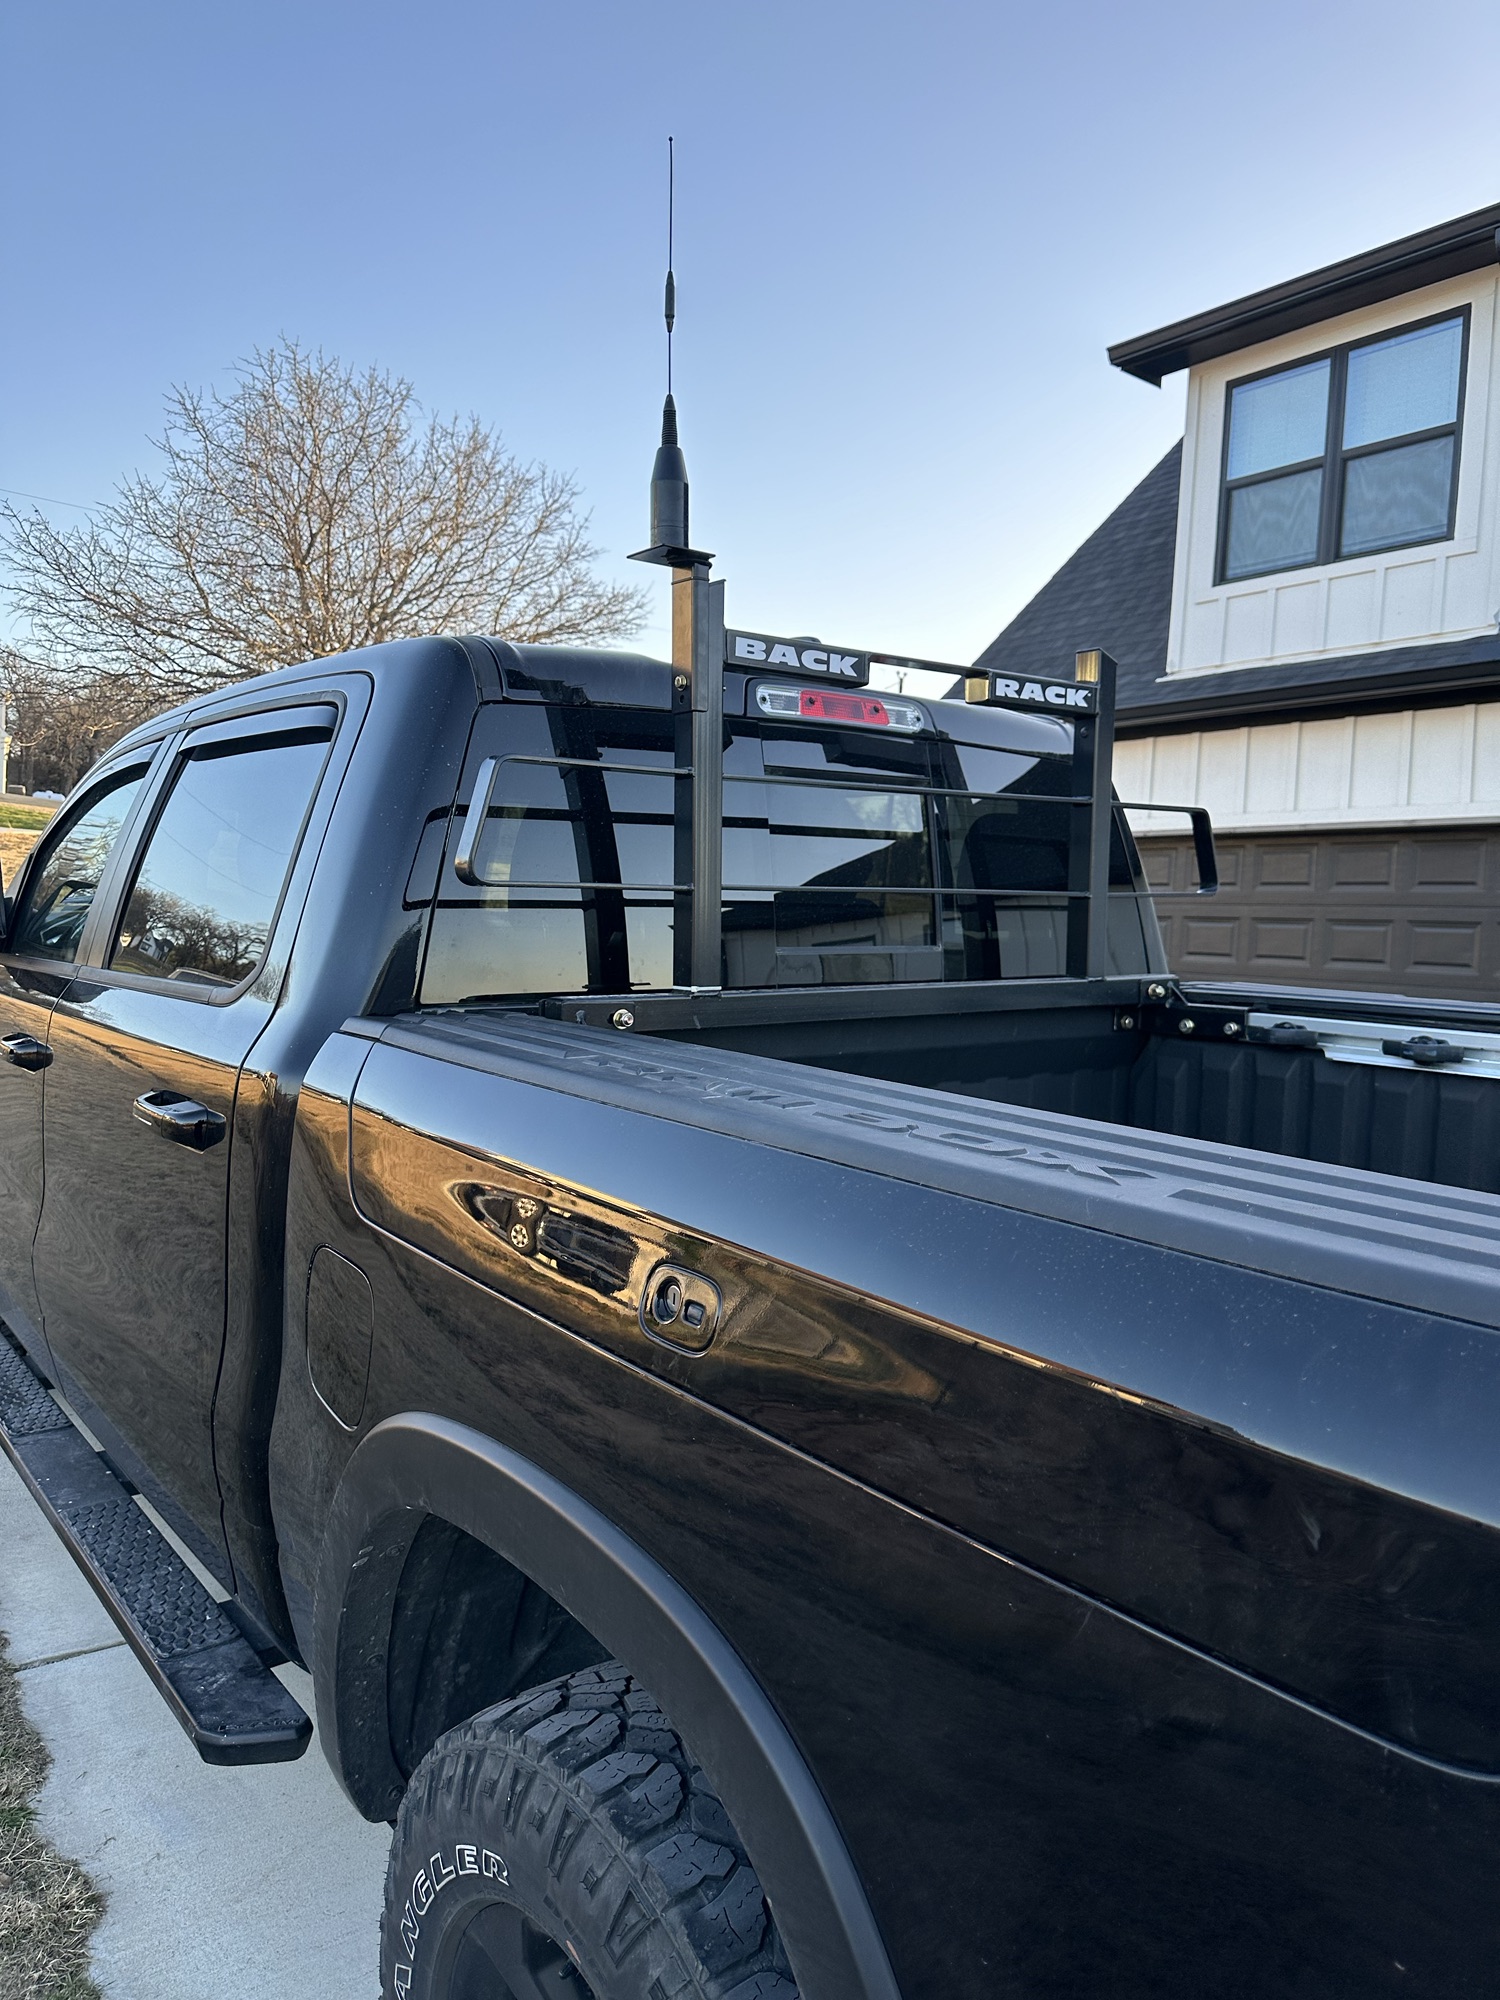
Antennas are another big change. Originally, I had CB whips on the bedside. With the body work, those are gone. Eliminating a potential rust source. The CB antenna is in a front fender mount. The uhf/vhf antenna is on a bracket on the back rack. I had actually planned the back rack prior to the accident, and the unit arrived the day-of. Great timing, right?

I managed to get MOST of the “uninstall” of my setup done in preparation for the new setup (remove old dash cam, remove unused coax, pull CB cables down to footboard for preparation for routing to overhead console, remove Anytone 578 from center console, pull GPS antenna off the dash) before the hard freeze here in the Fort Worth area.
The gps antenna supplied with the anytone has a fairly short cable so that will need an extension if I want to keep it up on the dashboard, which seemed to work well for an unobstructed sky view.
I pulled the overhead console and did a lot of test fitting and investigation as to how to get the new DIN sized radio installed and cables routed to it.


Since the radio is DIN sized, it’s a perfect fit for the sunglass holder (minus the door). I used a couple of”L” brackets bent into place to secure the DIN sleeve using existing vehicle screws – A real win. This put the radio where I could see it and not have it in the way. The only downside is the microphone cable. I’m already looking at wireless options.
Once I knew the radio would fit, I fished the coax and power cables to where I wanted them…. It took a bit of work to get them tucked above the headliner but the results were worth it.
I painted the DIN sleeve black to “hide” it, which worked out alright. I might look at a piece of ABS and building a customer shroud one day, but for now it fits well.
For power, I built a power pole extension to utilize the same power line I previously had on the dashboard, so my breaker panel is still correct.


And once I had it all in place, I decided to check the VSWR on my old NMO-27 antenna, since I’ve used it as a hillbilly fish tape to pull wires more than I’ve used it as an antenna in the past several years. I was shocked to see the results:
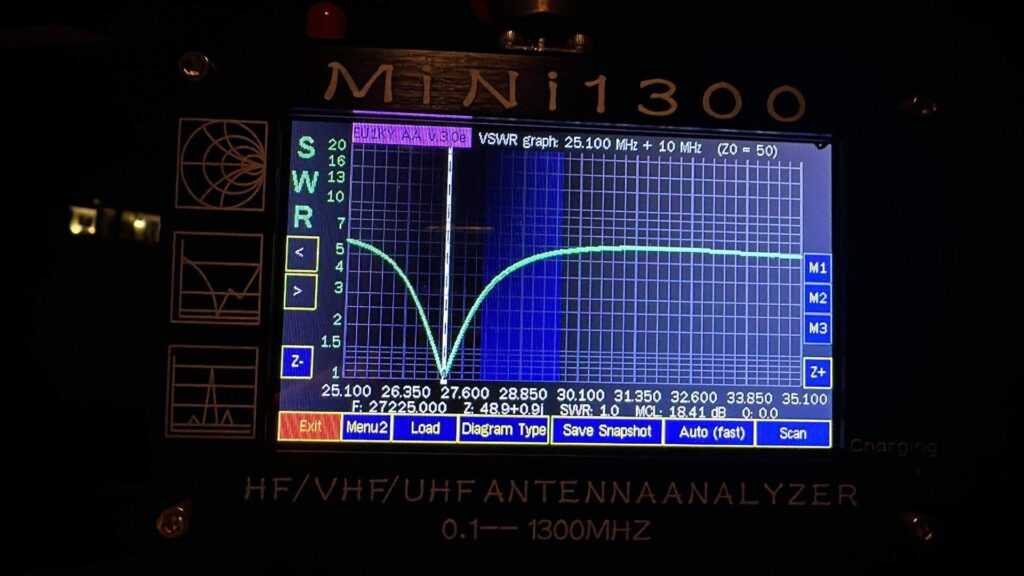
Dead on in the CB band. Obviously if I want it to work up in the 10M band, it’ll need a little retuning. But it was unchanged from when I had it on my suburban 3 years ago.
Next, I tackled the Anytone radio.
First task was to strip down the unused wiring off of the radio plate and install the anytone radio… the. I figured a firmware update couldn’t hurt. That all went well (firmware and baseband). The Bluetooth upgrade, as always, is a pain because it has to be done with an android device.
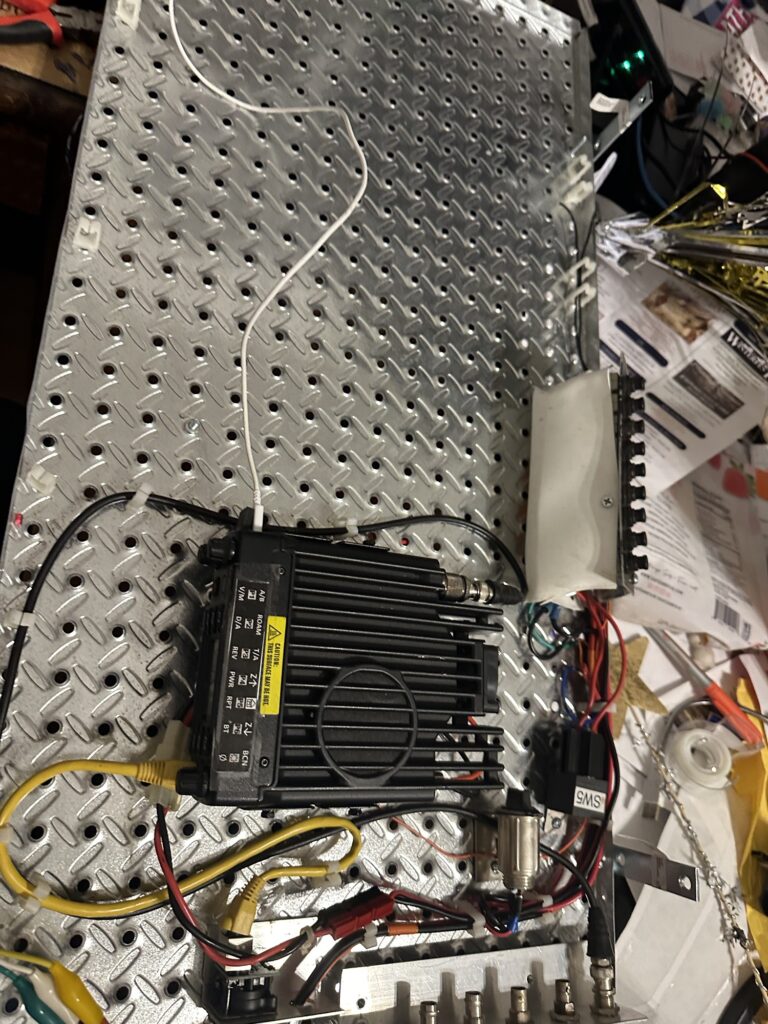
This is the only equipment going back there for the time being, so I have a lot of room for growth. The biggest function the plate adds is ignition switching of the radio, which is important to me. This is the easiest part of it all since I know the plate fits where I want it and I’ve already had the radio running remotely in the past.
One thing I did do this time is put a USB cable on the radio and clip it in, so I can access it for programming without worrying about whether or not I have a good micro USB cable …. Hoping this makes long term maintenance a bit easier.


Since I modified my rear seats to flip down, this makes for a convenient place to set my computer while working.